You know those days when you just need something sweet, and fast—but without making a big mess or pulling out a bunch of fancy tools? That’s where this easy fudge recipe comes in. It’s one of those no-fuss treats that feels extra special, even though it’s made with just a handful of simple ingredients you probably already have on hand. Whether you’re making a batch for a party, wrapping up treats for neighbors, or just sneaking a little something after dinner, this fudge is a crowd-pleaser every time.
In the sections ahead, I’ll walk you through everything you need to know—from the ingredients and step-by-step instructions to helpful tips and fun ways to customize each batch. This way, you can make it just the way your family loves it, every single time.
Why You’ll Love This Easy Fudge Recipe
If you’re anything like me, you’ve probably stood in your kitchen at some point thinking, “I want to make something sweet—but it has to be fast, simple, and really good.” That’s where this easy fudge recipe shines. It’s one of those treats you can count on to come out right every single time, and it fits just about any occasion—from holiday trays to last-minute gifts, or even just a cozy movie night at home.
Here’s why this fudge deserves a spot in your go-to dessert lineup:
It uses just a few simple ingredients. With chocolate chips, sweetened condensed milk, and butter, you’ve got everything you need. No complicated steps or tricky tools—just melt, stir, and chill.
It’s fast and fuss-free. This isn’t one of those projects that takes up your whole afternoon. You can make it in minutes, let it set while you get on with your day, and come back to a pan full of perfectly smooth chocolate fudge.
Great for gifting and gatherings. Whether you’re packaging it up in treat bags or setting it out for guests, fudge always feels like a little bit of homemade comfort.
Perfect for making ahead. This fudge holds up beautifully in the fridge or freezer, which makes it a smart option for party prep or holiday baking.
Kid-friendly fun. Even little hands can help stir or sprinkle toppings, making this a great recipe to enjoy together.
Customizable flavors. Love peanut butter? Craving mint chocolate? Want a batch of fudge recipe with cocoa powder? There are endless ways to tweak this base and make it your own.
This recipe is all about keeping things joyful and easy in the kitchen—because sweets should bring a smile, not stress. Let’s take a closer look at the ingredients that make this treat so simple and satisfying.
Simple Ingredients for the Best Easy Fudge
Before we turn on the stove, let’s take a quick look at the short list of ingredients that make this easy fudge recipe such a go-to. You don’t need anything fancy—just a few pantry staples that melt together into a rich, chocolatey treat. Every ingredient has a job to do, and once you see how simple it is, you’ll want to make this fudge on repeat.
What You’ll Need
- 3 cups semi-sweet chocolate chips
These form the base of the fudge. Semi-sweet strikes the right balance—rich but not overly sweet—and melts smoothly. - 1 can (14 oz) sweetened condensed milk
This pulls double duty: sweetening the fudge and giving it that silky, creamy texture that sets beautifully when chilled. - 4 tablespoons unsalted butter
Butter adds richness and a soft finish. It also helps the fudge stay sliceable without becoming crumbly. - 1 teaspoon vanilla extract
Just a splash deepens the chocolate flavor and gives the fudge a cozy, bakery-style finish. - ⅛ teaspoon fine sea salt
A pinch of salt brings out all the chocolate notes and keeps the sweetness in check.
Optional Add-Ins
Want to make it your own? Here are a few mix-ins that take your fudge from classic to completely personalized:
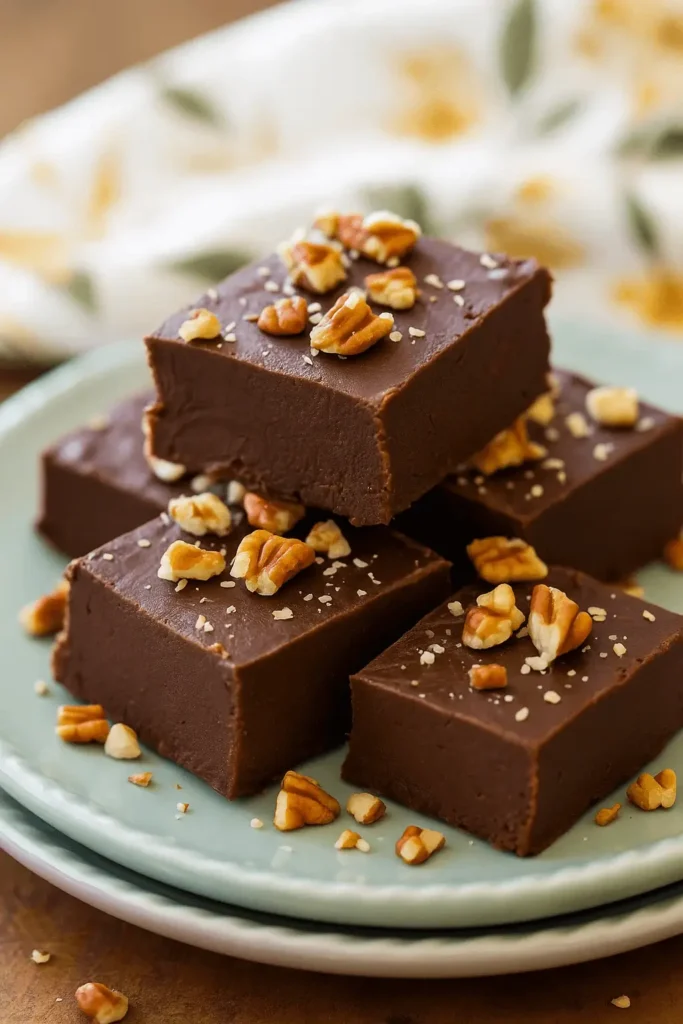
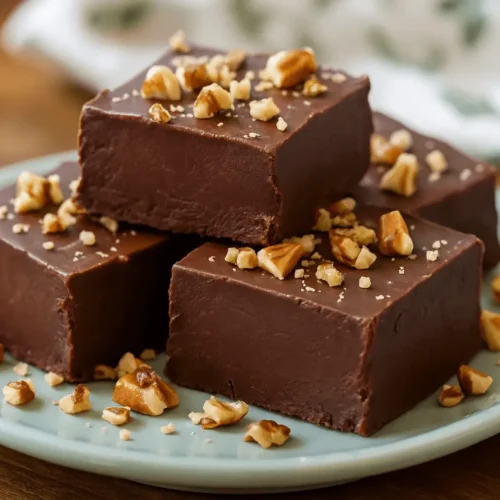
- Chopped nuts (½ cup): Pecans, almonds, or walnuts add crunch and contrast.
- Mini marshmallows (1 cup): Think rocky road vibes—soft and chewy pockets throughout.
- Crushed peppermint (¼ cup): Perfect for the holidays or if you love a minty twist.
- Sprinkles or sea salt (for topping): Add a little flair on top before it sets.
Pro Tip: For a fun flavor spin, try using dark chocolate chips for a more intense taste, or mix in a dash of cinnamon and a pinch of cayenne for a warm, slightly spicy version inspired by Mexican hot chocolate. These little tweaks turn your fudge recipe into something new every time.
Now that your ingredients are ready, let’s head to the stovetop and make some sweet magic happen.
How to Make an Easy Fudge Recipe at Home
This is one of those recipes where the process is just as satisfying as the result. It comes together in a single saucepan and fills your kitchen with the kind of chocolatey smell that draws everyone in. Follow these steps and you’ll have a perfect batch in no time.
Step-by-Step Instructions
1. Prep your pan.
Line an 8×8-inch square dish with parchment paper, leaving enough overhang to lift the fudge out later. You can lightly grease the edges too, just to make sure nothing sticks.
2. Melt everything together.
In a medium, heavy-bottom saucepan, combine the chocolate chips, sweetened condensed milk, and butter. Set the heat to low and stir slowly with a rubber spatula as everything begins to melt. You want a smooth, glossy texture without rushing—high heat can scorch the chocolate.
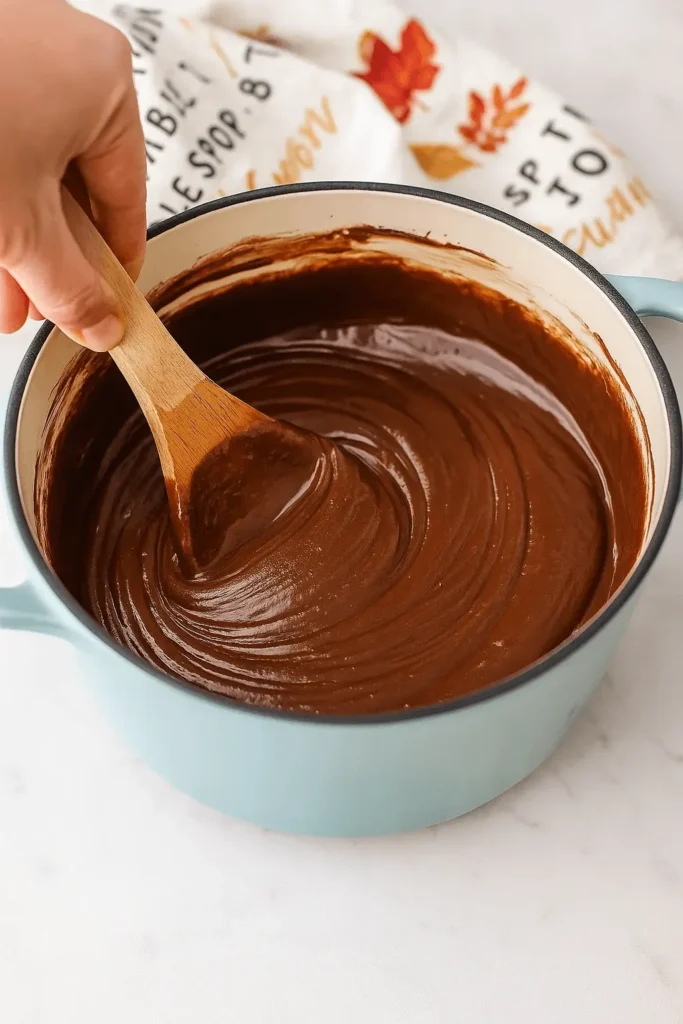
3. Add flavor boosters.
Once melted and silky, remove the pan from the heat. Stir in the vanilla extract and sea salt. If you’re using mix-ins like nuts or marshmallows, fold them in now while the fudge is still warm and easy to stir.
4. Pour and smooth.
Quickly transfer the fudge mixture into your prepared pan. Use a spatula to spread it evenly and smooth the top. If you’re adding toppings like crushed peppermint or sprinkles, sprinkle them over now while the surface is still soft.
5. Chill until firm.
Place the pan in the fridge and let it chill for at least 2 hours, or until the center feels set to the touch. For a firmer texture, you can let it go overnight.
6. Slice and enjoy.
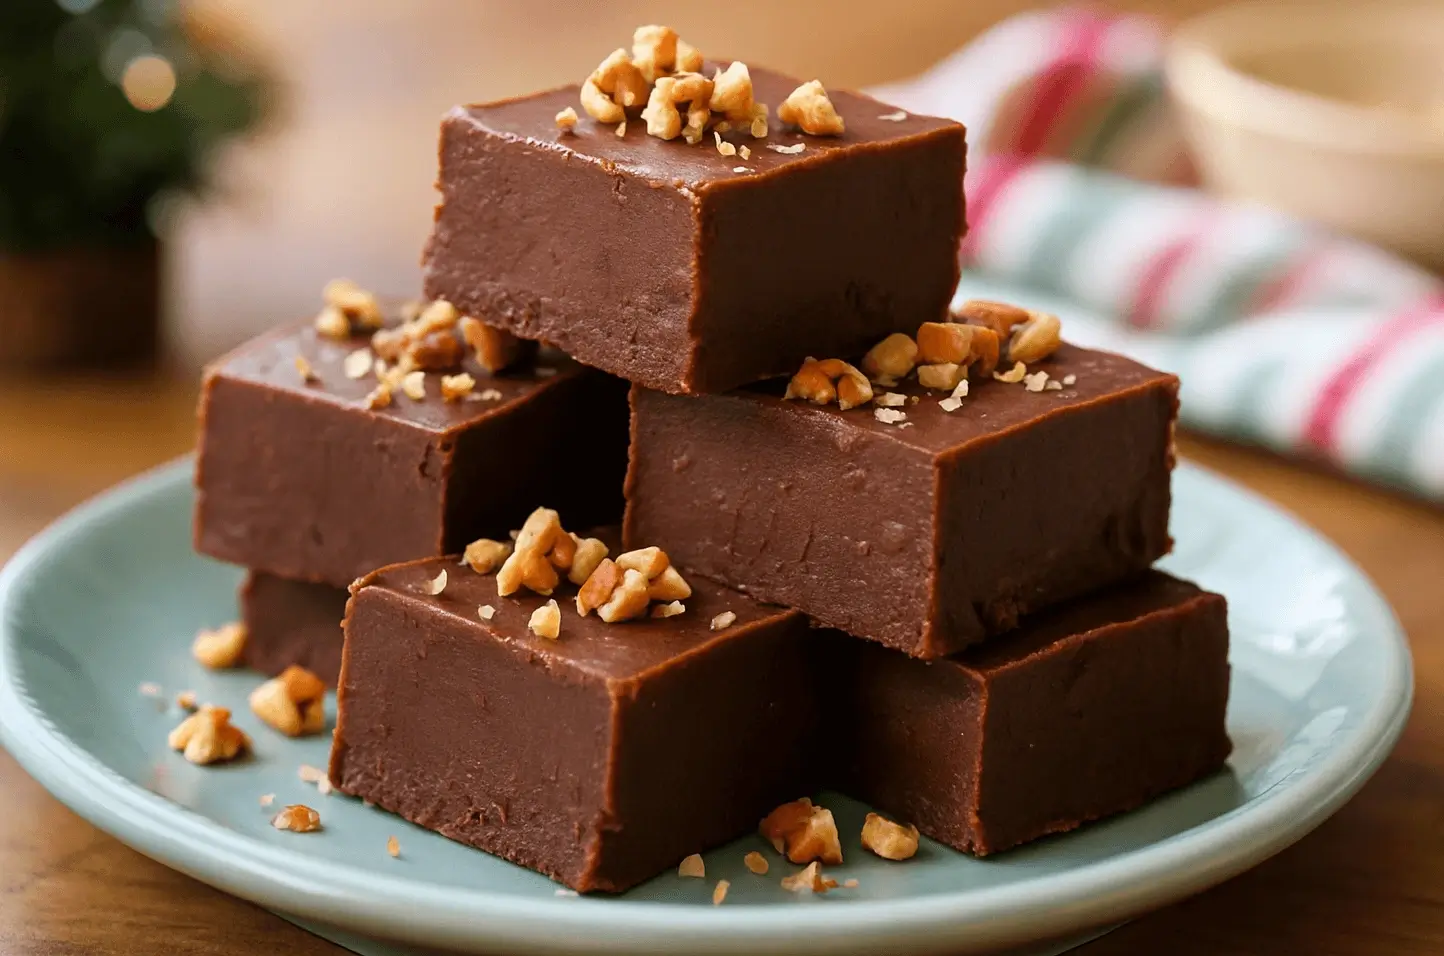
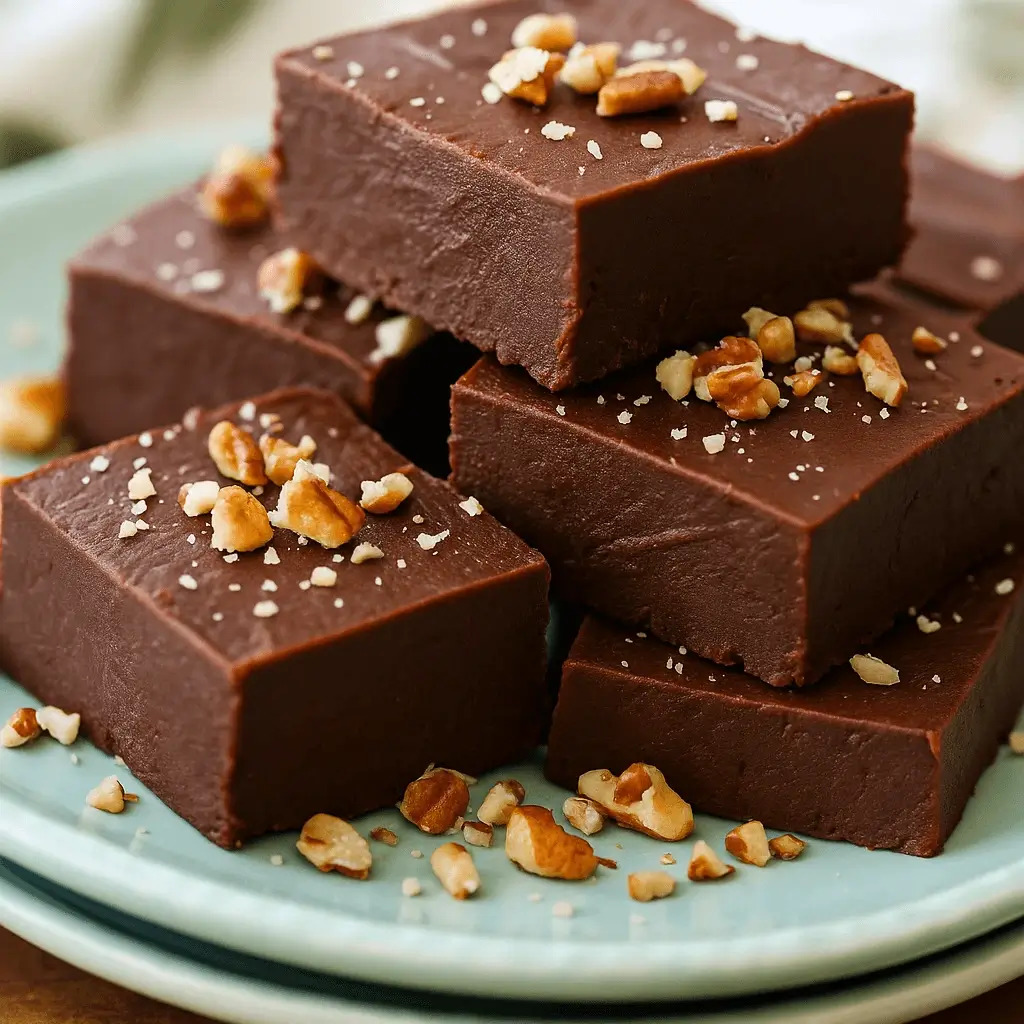
Once the fudge is set, lift it out of the pan using the parchment flaps. Use a sharp knife to cut it into squares. For the cleanest cuts, warm your knife under hot water and wipe it dry between slices.
There’s just something so satisfying about cutting into a fresh batch of homemade fudge. Smooth, shiny, and packed with flavor—it’s the kind of treat that never lasts long. Up next, I’ll share a few helpful tips and creative twists to make every batch even better.
Tips and Variations for the Best Easy Fudge Recipe
Once you’ve made this easy fudge recipe a time or two, you’ll start to see just how flexible and fun it really is. Whether you’re aiming for a flawless texture or playing around with flavors, these tips and twists will help you level up your fudge game every single time.
- Keep the heat low and steady. Melting chocolate gently is key—rushing it can lead to clumps or a grainy texture. If your mixture looks too thick before it’s fully smooth, take it off the heat and stir patiently.
- Dry tools are a must. Even a little bit of water can cause chocolate to seize, so make sure your pan, spatula, and bowls are completely dry before you start.
- Add mix-ins while the fudge is still warm. If you’re folding in marshmallows, crushed cookies, or chopped nuts, do it right after removing the pan from the heat. That way, everything blends in easily without clumping.
- Marble it. Want a swirl of peanut butter, caramel, or even cookie butter? Gently drop a few spoonfuls over the top of the warm fudge, then use a knife or toothpick to drag it into beautiful swirls.
- Play with flavor combos. For a fudge recipe with cocoa powder, you can sub ¾ cup unsweetened cocoa and 1 cup powdered sugar in place of chocolate chips. Add a bit of espresso powder for a mocha vibe, or cinnamon and a pinch of cayenne for something with a warm twist.
- Make it festive. Sprinkle crushed peppermint for the holidays, or try seasonal toppings like chopped dried cranberries and pistachios. This base adapts beautifully to any occasion.
Even the tiniest tweaks can make each batch feel special, whether you’re baking with kids or surprising someone with a sweet treat. Next up—let’s talk about the fun part: how to serve it!
Serving Ideas for Your Homemade Easy Fudge
This easy fudge isn’t just a treat—it’s a little moment of joy on a plate (or tucked into a gift box). However you serve it, it adds a touch of homemade charm to just about any setting.
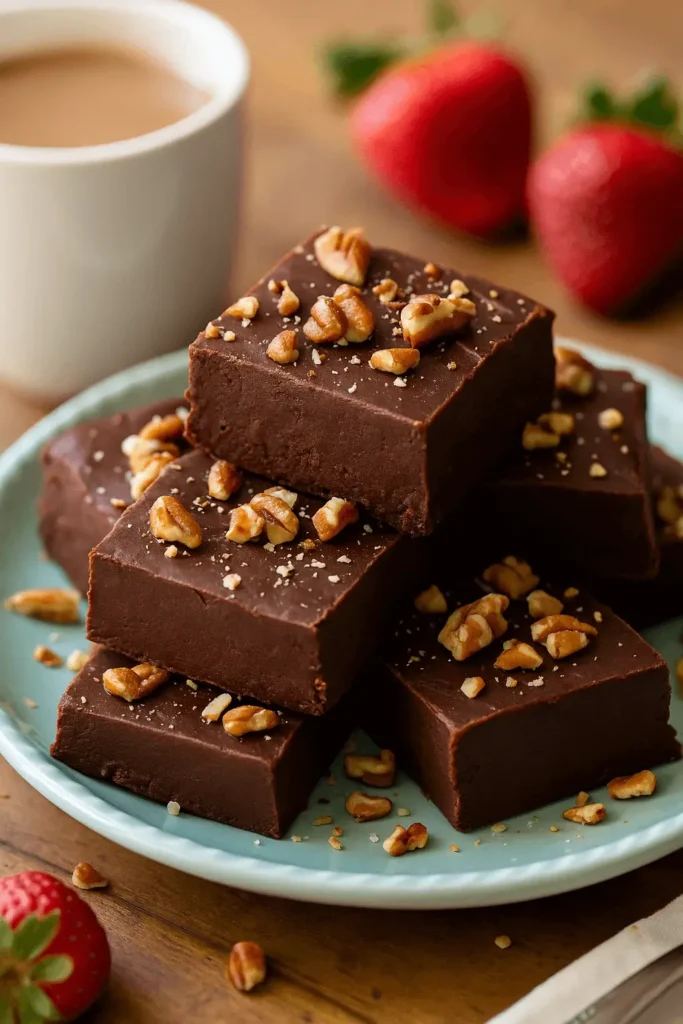
- Dessert trays and party platters: Slice into bite-size squares and place on a tray with cookies, fruit, or other sweets for a pretty presentation.
- Holiday gift boxes: Layer pieces between parchment paper in a small tin or box and tie it with ribbon for a thoughtful handmade gift.
- Lunchbox treat: Wrap a piece in wax paper and add it to a lunchbox for a surprise at school or work.
- Celebration table centerpiece: Stack squares in a little pyramid on a cake stand and sprinkle with powdered sugar or colorful sprinkles.
- Ice cream topping: Chop leftover fudge into chunks and sprinkle over a scoop of vanilla or chocolate ice cream.
- Cozy night treat: Just a small square with a warm cup of coffee or tea hits the spot when you’re winding down for the evening.
The best part is, fudge fits in wherever there’s a little sweet craving or something worth celebrating.
And if you’re lucky enough to have leftovers (I know—big if), let’s make sure you know exactly how to store them right.
How to Store Fudge and Keep It Fresh Longer
Homemade fudge stores like a dream, which makes it perfect for planning ahead or sneaking a square here and there throughout the week. Here’s how to keep your easy fudge recipe tasting just as good as the day you made it:
- Room temperature: If your kitchen stays cool, you can keep fudge in an airtight container at room temp for up to 5 days. Just layer parchment between the squares to prevent sticking.
- Refrigerator: For longer storage, pop the fudge in the fridge. It stays fresh for up to 2–3 weeks this way and firms up a little more. Let it sit out for 10 minutes before serving so it softens just enough to melt in your mouth.
- Freezer-friendly: Yes, you can freeze fudge! Wrap the whole block (or individual pieces) tightly in plastic wrap, then seal in a freezer-safe bag or container. It’ll keep for up to 3 months. Thaw in the fridge overnight and enjoy just like fresh.
- Serving tip: For clean edges, always use a sharp knife and wipe it between slices. A warm blade makes it even easier.
Whether you’re making one batch or several, proper storage helps you keep that rich, chocolatey texture just right—because no one wants dry or crumbly fudge when it could be soft and silky.
Easy Fudge Recipe That Makes Everyone Smile
Ingredients
- 3 cups semi-sweet chocolate chips
- 1 14 oz can sweetened condensed milk
- 4 tablespoons unsalted butter
- 1 teaspoon vanilla extract
- ⅛ teaspoon fine sea salt
Optional Ingredients:
- ½ cup chopped nuts
- 1 cup mini marshmallows
- ¼ cup crushed peppermint or sprinkles for topping
Instructions
- Line an 8×8 pan with parchment paper, leaving overhang on the sides.
- In a saucepan over low heat, melt the chocolate chips, condensed milk, and butter, stirring constantly until smooth.
- Remove from heat and stir in vanilla and salt. Fold in any add-ins.
- Pour into the pan and smooth the top. Add toppings if desired.
- Chill for at least 2 hours or until firm.
- Slice into squares and enjoy!
FAQs About This Easy Fudge Recipe
Got questions while making this easy fudge recipe? You’re not alone—these are the most common ones that pop up in my kitchen, especially when I’m making it with kids or prepping it for a party. Let’s clear them up so your fudge turns out just the way you want it.
1. Can I use a different kind of chocolate?
Absolutely. Semi-sweet chocolate chips work great for a classic taste, but you can swap in dark chocolate, milk chocolate, or even a mix of both. Just make sure you’re using good-quality chips or chopped bars that melt smoothly.
2. What if I only have cocoa powder instead of chocolate chips?
You can still make a delicious fudge recipe with cocoa powder! Mix ¾ cup unsweetened cocoa powder with 1 can of sweetened condensed milk and 1 cup powdered sugar. Stir it over low heat until thick and glossy, then follow the rest of the recipe as usual.
3. My fudge didn’t set—what happened?
Usually, this means it needed a little more time in the fridge. Let it chill a bit longer—overnight is often best for clean slices. Also, double-check that you measured everything accurately, especially the condensed milk.
4. Can I double this easy fudge recipe?
Definitely! Just use a 9×13-inch pan instead of an 8×8, and make sure to stir a little longer since you’ll have more chocolate to melt. Everything else stays the same.
5. How long will homemade fudge last?
When stored properly, this condensed milk fudge can last up to 5 days at room temperature, 2–3 weeks in the fridge, or up to 3 months in the freezer. Just be sure to keep it tightly wrapped or in an airtight container so it stays fresh and flavorful.
6. Is this fudge recipe good for gifting?
Yes! This is one of my favorite easy fudge recipes for holiday boxes, party favors, or teacher treats. Cut it into squares, wrap in parchment or wax paper, and place in a cute tin or treat bag. It’s simple, sweet, and always appreciated.
Fudge really is one of those recipes that feels fancy but couldn’t be easier. And once you’ve made it once, you’ll feel confident tweaking it any way you like.
Conclusion
There’s something so special about a recipe that’s this simple and still feels like a treat every time. Whether you’re making it for the holidays, sharing with friends, or sneaking a square after dinner, this easy fudge recipe brings a little sweetness to any kind of day. It’s the kind of dessert that doesn’t ask for much but always delivers something memorable—creamy, chocolatey, and full of cozy, homemade charm.
I hope this becomes one of those go-to recipes you come back to whenever you want something easy, fun, and just a little extra special. And if you try it out, I’d love to know how you made it your own—whether you added sprinkles, nuts, or just kept it classic.